> ## Documentation Index
> Fetch the complete documentation index at: https://docs.bondata.ai/llms.txt
> Use this file to discover all available pages before exploring further.

# Step 4: Setting Up Your First Agent

> Build your first automated workflow in BonData

Agents are automated workflows that act on data across your connected systems. Each Agent defines **conditions** (when to act) and **actions** (what to do).

## Agent types

| Type           | Purpose                                                                                       |
| -------------- | --------------------------------------------------------------------------------------------- |
| **Automation** | Trigger actions based on data conditions (missing fields, threshold breaches, status changes) |
| **Migration**  | Move data between systems with field mapping, without storing it in BonData                   |

## Build your first Agent

<Steps>
  <Step title="Open the Agents page">
    Go to **Agents** in the sidebar and click **Create New**.
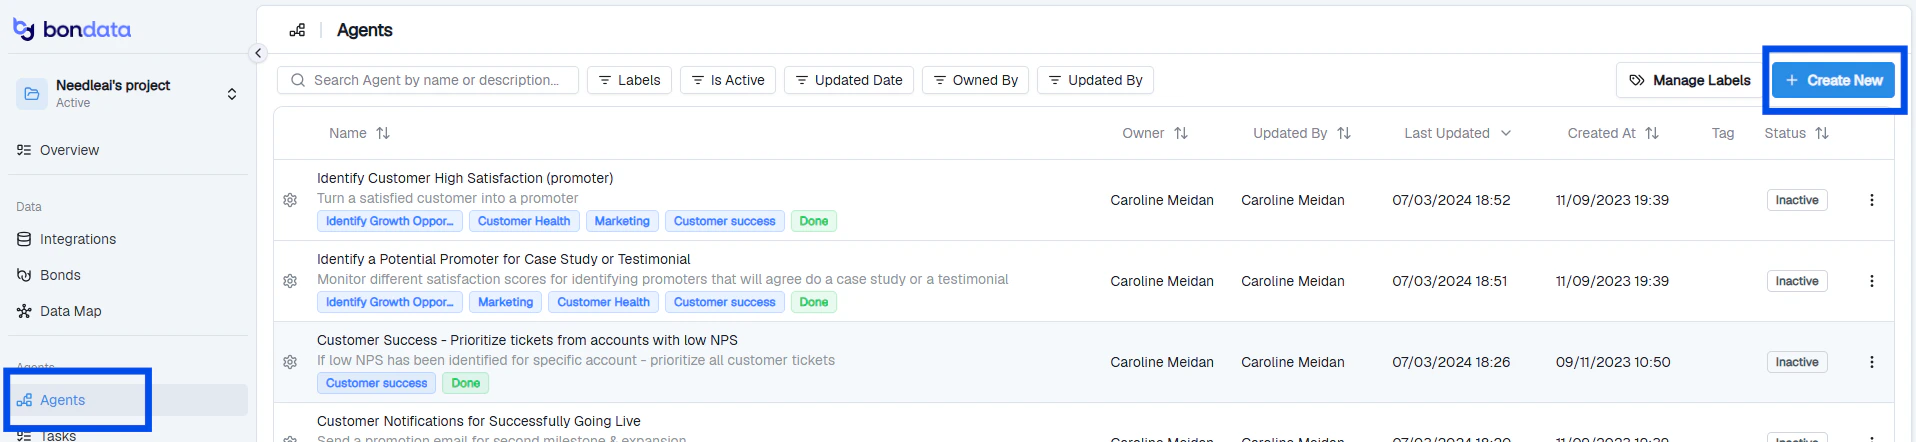
    <Frame caption="The Agents list with the Create New button">
      <img src="https://mintcdn.com/bondata/GMP8l5V0eEm-sA0-/images/guide/getting-started/first-agent-1.png?fit=max&auto=format&n=GMP8l5V0eEm-sA0-&q=85&s=1e54d52343fffec6198287ac490462f9" width="1916" height="442" data-path="images/guide/getting-started/first-agent-1.png" />
    </Frame>
  </Step>

  <Step title="Name your Agent">
    Give it a clear name (e.g., "Accounts Missing Owner") and an optional description.
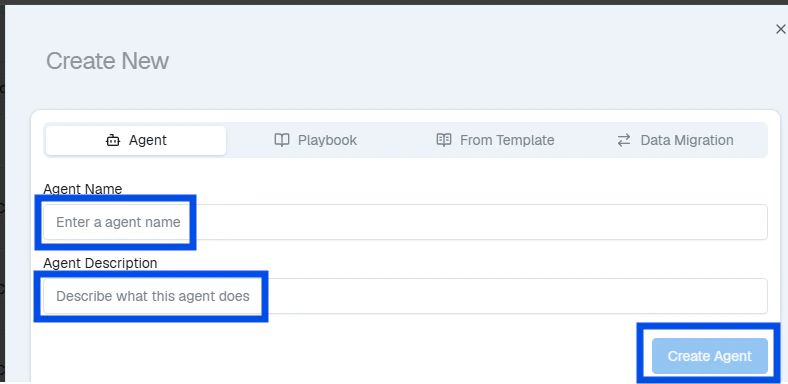
    <Frame caption="Naming a new Agent">
      <img src="https://mintcdn.com/bondata/GMP8l5V0eEm-sA0-/images/guide/getting-started/first-agent-2.png?fit=max&auto=format&n=GMP8l5V0eEm-sA0-&q=85&s=498fde1f804af102531552bc0ceaa814" width="788" height="384" data-path="images/guide/getting-started/first-agent-2.png" />
    </Frame>
  </Step>

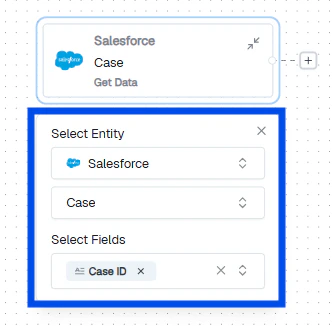
  <Step title="Add a Get Data node">
    Click **+** to add your first node - always a **Get Data** node. Select the integration, entity, and fields to monitor.

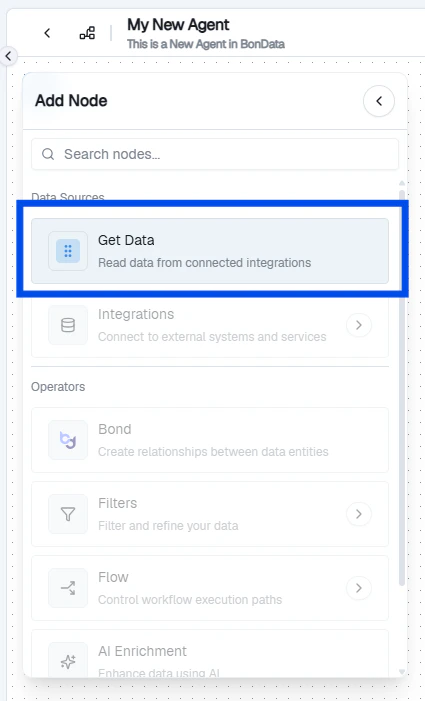
    <Frame caption="Adding the first Get Data node">
      <img src="https://mintcdn.com/bondata/gJUBvJUhIKDjFqN7/images/guide/getting-started/first-agent-3.png?fit=max&auto=format&n=gJUBvJUhIKDjFqN7&q=85&s=e3e8a86c6dcb6c4a90d9668aa5180b7c" width="74" height="74" data-path="images/guide/getting-started/first-agent-3.png" />
    </Frame>

    <Frame caption="Selecting the entity and fields">
      <img src="https://mintcdn.com/bondata/gJUBvJUhIKDjFqN7/images/guide/getting-started/first-agent-4.png?fit=max&auto=format&n=gJUBvJUhIKDjFqN7&q=85&s=1145c4ae173de5e8625424f4750ebcc9" width="425" height="701" data-path="images/guide/getting-started/first-agent-4.png" />
    </Frame>

    <Frame caption="Configured Get Data node">
      <img src="https://mintcdn.com/bondata/gJUBvJUhIKDjFqN7/images/guide/getting-started/first-agent-5.png?fit=max&auto=format&n=gJUBvJUhIKDjFqN7&q=85&s=d8aed3043fae2aeb36ba839881d1ab4b" width="335" height="326" data-path="images/guide/getting-started/first-agent-5.png" />
    </Frame>
  </Step>

  <Step title="Add a filter">
    Click **+ > Flow Basics** and select **Simple Filter**. Set the entity, field, operator, and value.
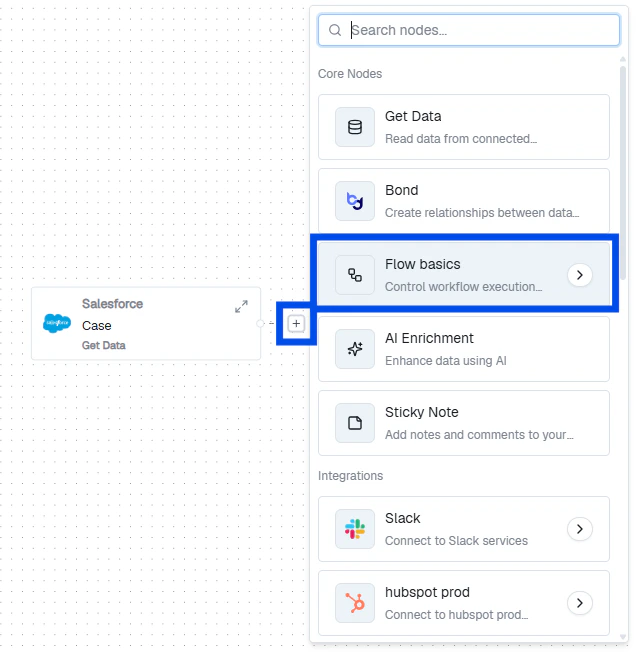
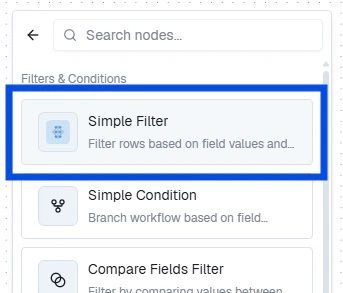
    <Frame caption="Adding a Simple Filter node">
      <img src="https://mintcdn.com/bondata/gJUBvJUhIKDjFqN7/images/guide/getting-started/first-agent-6.png?fit=max&auto=format&n=gJUBvJUhIKDjFqN7&q=85&s=44706b2c44ec8d7698bc4499dd905192" width="636" height="654" data-path="images/guide/getting-started/first-agent-6.png" />
    </Frame>

    <Frame caption="Configuring filter conditions">
      <img src="https://mintcdn.com/bondata/gJUBvJUhIKDjFqN7/images/guide/getting-started/first-agent-7.png?fit=max&auto=format&n=gJUBvJUhIKDjFqN7&q=85&s=70a60e2b48eccdb3f6c758ba098a13c3" width="343" height="293" data-path="images/guide/getting-started/first-agent-7.png" />
    </Frame>

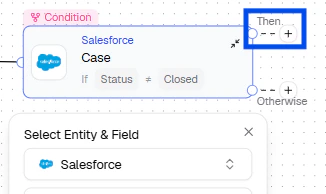
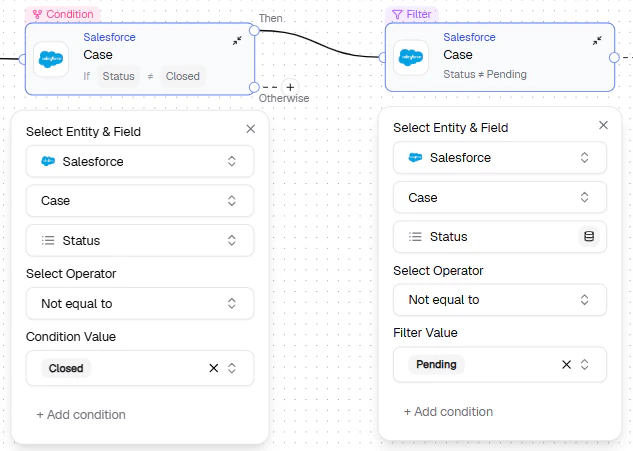
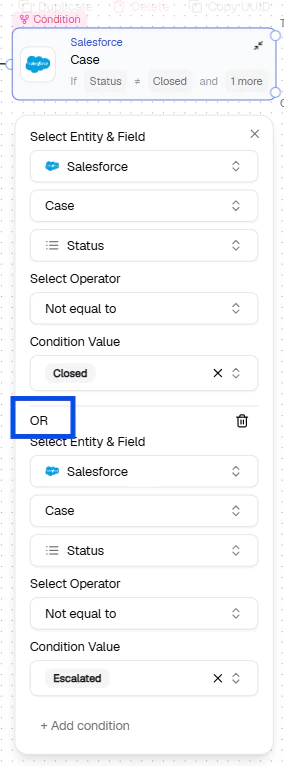
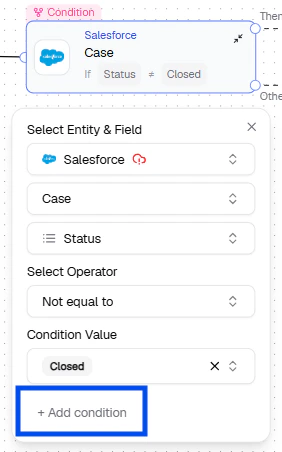
    **Filter logic:**

    * **AND** - Add another Simple Filter from the **Then +** option
    * **OR** - Add a condition to the existing node from **+ Add condition**
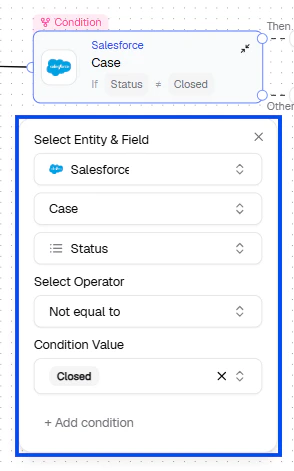
    <Frame caption="AND logic: chaining multiple filter nodes">
      <img src="https://mintcdn.com/bondata/gJUBvJUhIKDjFqN7/images/guide/getting-started/first-agent-8.png?fit=max&auto=format&n=gJUBvJUhIKDjFqN7&q=85&s=0e814a010f7f291c8c9a1c0d263f33d7" width="294" height="471" data-path="images/guide/getting-started/first-agent-8.png" />
    </Frame>

    <Frame caption="OR logic: multiple conditions in one node">
      <img src="https://mintcdn.com/bondata/gJUBvJUhIKDjFqN7/images/guide/getting-started/first-agent-9.png?fit=max&auto=format&n=gJUBvJUhIKDjFqN7&q=85&s=1f468ddcb74efab5e063fd599bac34d4" width="326" height="194" data-path="images/guide/getting-started/first-agent-9.png" />
    </Frame>

    <Frame caption="Combined filter view">
      <img src="https://mintcdn.com/bondata/GMP8l5V0eEm-sA0-/images/guide/getting-started/first-agent-10.png?fit=max&auto=format&n=GMP8l5V0eEm-sA0-&q=85&s=9ea69535794d4966b9a896567ead1c79" width="633" height="451" data-path="images/guide/getting-started/first-agent-10.png" />
    </Frame>
  </Step>

  <Step title="Set actions">
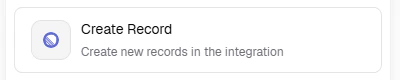
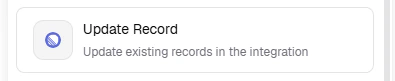
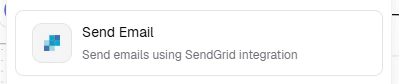
    Choose what happens when conditions match:
    <Frame caption="Selecting an action type">
      <img src="https://mintcdn.com/bondata/GMP8l5V0eEm-sA0-/images/guide/getting-started/first-agent-11.png?fit=max&auto=format&n=GMP8l5V0eEm-sA0-&q=85&s=fb7687cda62a53aded858b74982b65a3" width="282" height="452" data-path="images/guide/getting-started/first-agent-11.png" />
    </Frame>

    <Frame caption="Configuring the action details">
      <img src="https://mintcdn.com/bondata/GMP8l5V0eEm-sA0-/images/guide/getting-started/first-agent-12.png?fit=max&auto=format&n=GMP8l5V0eEm-sA0-&q=85&s=d4a9388da9e9f36d0b7875a24f180ad0" width="284" height="766" data-path="images/guide/getting-started/first-agent-12.png" />
    </Frame>

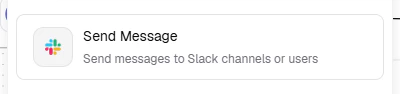
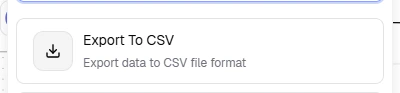
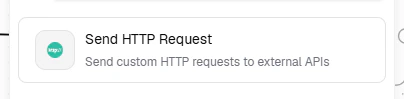
    Available actions:

    * Create or update records
    * Send Slack or email alerts
    * Generate a CSV
    * Send an HTTP request
  </Step>

  <Step title="Map fields with Mentions">
    Use **Mentions** to dynamically insert values from one system into another. Click the mention button and select the source field.
    <Frame caption="Using Mentions to map fields between systems">
      <img src="https://mintcdn.com/bondata/GMP8l5V0eEm-sA0-/images/guide/getting-started/first-agent-13.png?fit=max&auto=format&n=GMP8l5V0eEm-sA0-&q=85&s=9e1d8eb5eab1a1b337821ddf6c7e351f" width="400" height="80" data-path="images/guide/getting-started/first-agent-13.png" />
    </Frame>

    <Frame caption="Selecting a source field for the mention">
      <img src="https://mintcdn.com/bondata/GMP8l5V0eEm-sA0-/images/guide/getting-started/first-agent-14.png?fit=max&auto=format&n=GMP8l5V0eEm-sA0-&q=85&s=721cccf10b5f2150af0f1aadfb5413ed" width="395" height="81" data-path="images/guide/getting-started/first-agent-14.png" />
    </Frame>

    <Frame caption="Mention inserted into the action configuration">
      <img src="https://mintcdn.com/bondata/GMP8l5V0eEm-sA0-/images/guide/getting-started/first-agent-15.png?fit=max&auto=format&n=GMP8l5V0eEm-sA0-&q=85&s=fd78b2f05755b54709457f3a3c5b8000" width="400" height="94" data-path="images/guide/getting-started/first-agent-15.png" />
    </Frame>

    You can also use:

    * **Conditional Mentions** - Apply transformations (e.g., if value is 1 → "Yes", else → "No")
    * **Default values** - Fallback when the source field is empty
    <Frame caption="Conditional mention configuration">
      <img src="https://mintcdn.com/bondata/GMP8l5V0eEm-sA0-/images/guide/getting-started/first-agent-16.png?fit=max&auto=format&n=GMP8l5V0eEm-sA0-&q=85&s=9ca65367e1c9205294d9240c50cad628" width="399" height="84" data-path="images/guide/getting-started/first-agent-16.png" />
    </Frame>

    <Frame caption="Setting default values for empty fields">
      <img src="https://mintcdn.com/bondata/GMP8l5V0eEm-sA0-/images/guide/getting-started/first-agent-17.png?fit=max&auto=format&n=GMP8l5V0eEm-sA0-&q=85&s=b1be5fc93099c8b4e1802db05f4bca92" width="400" height="93" data-path="images/guide/getting-started/first-agent-17.png" />
    </Frame>

    <Frame caption="Complete mention with conditional logic">
      <img src="https://mintcdn.com/bondata/GMP8l5V0eEm-sA0-/images/guide/getting-started/first-agent-18.png?fit=max&auto=format&n=GMP8l5V0eEm-sA0-&q=85&s=38664e9f6736ae84f2d55df4bfbbd7ea" width="404" height="99" data-path="images/guide/getting-started/first-agent-18.png" />
    </Frame>
  </Step>

  <Step title="Choose execution mode">
    <Frame caption="Execution mode selection">
      <img src="https://mintcdn.com/bondata/GMP8l5V0eEm-sA0-/images/guide/getting-started/first-agent-19.png?fit=max&auto=format&n=GMP8l5V0eEm-sA0-&q=85&s=d5a0f897eef5c8d891e52871323b8ff8" width="789" height="93" data-path="images/guide/getting-started/first-agent-19.png" />
    </Frame>

    * **Automatic** - tasks run immediately
    * **Manual** - tasks queue for your approval
  </Step>
</Steps>

## Test before going live

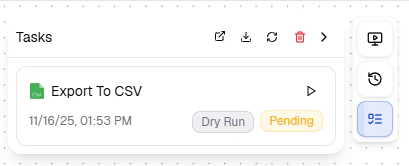
Click **Test** (top right) to simulate the Agent without performing any actions. Task previews appear in the right panel.
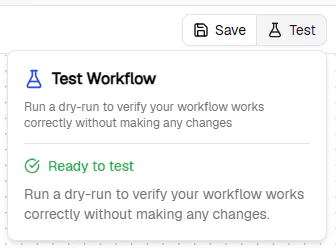
<Frame caption="Test mode showing task previews">
  <img src="https://mintcdn.com/bondata/GMP8l5V0eEm-sA0-/images/guide/getting-started/first-agent-20.png?fit=max&auto=format&n=GMP8l5V0eEm-sA0-&q=85&s=be24ced378cbacb4fb045663a69a22cf" width="336" height="252" data-path="images/guide/getting-started/first-agent-20.png" />
</Frame>

<Frame caption="Test results in the task panel">
  <img src="https://mintcdn.com/bondata/GMP8l5V0eEm-sA0-/images/guide/getting-started/first-agent-21.png?fit=max&auto=format&n=GMP8l5V0eEm-sA0-&q=85&s=e6bed839eae3504fc1b2ac7f7540a320" width="108" height="44" data-path="images/guide/getting-started/first-agent-21.png" />
</Frame>

## Activate your Agent

<Steps>
  <Step title="Click Active in the top right">
    <Frame caption="Activating the Agent">
      <img src="https://mintcdn.com/bondata/gJUBvJUhIKDjFqN7/images/guide/getting-started/first-agent-22.png?fit=max&auto=format&n=gJUBvJUhIKDjFqN7&q=85&s=9a227753c6b4900437fe9d97be0c5839" width="412" height="84" data-path="images/guide/getting-started/first-agent-22.png" />
    </Frame>
  </Step>

  <Step title="Choose the run mode">
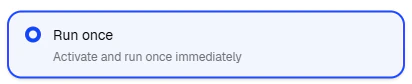
    * **Run once** - executes a single time
    * **Schedule** - runs on a recurring frequency (e.g., every 15 minutes, or a custom cron expression)
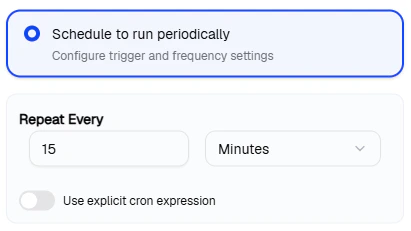
    <Frame caption="Schedule configuration">
      <img src="https://mintcdn.com/bondata/gJUBvJUhIKDjFqN7/images/guide/getting-started/first-agent-23.png?fit=max&auto=format&n=gJUBvJUhIKDjFqN7&q=85&s=785ae96ac68db7eb6a057ae2e4fd0c7e" width="411" height="231" data-path="images/guide/getting-started/first-agent-23.png" />
    </Frame>
  </Step>

  <Step title="Configure task duplication">
    * **Off (default)** - won't create duplicate tasks for the same matched record
    * **On** - creates new tasks every run regardless
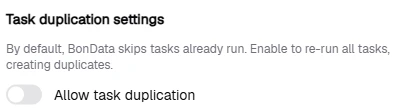
    <Frame caption="Task duplication settings">
      <img src="https://mintcdn.com/bondata/gJUBvJUhIKDjFqN7/images/guide/getting-started/first-agent-24.png?fit=max&auto=format&n=gJUBvJUhIKDjFqN7&q=85&s=5efb80a80411e63cacad1570c1d292ed" width="402" height="112" data-path="images/guide/getting-started/first-agent-24.png" />
    </Frame>
  </Step>

  <Step title="Apply">
    Click **Apply** to start the Agent.
  </Step>
</Steps>

## Monitor your Agent

<Frame caption="Agent dashboard showing task statuses">
  <img src="https://mintcdn.com/bondata/gJUBvJUhIKDjFqN7/images/guide/getting-started/first-agent-25.png?fit=max&auto=format&n=gJUBvJUhIKDjFqN7&q=85&s=07ce1fcf32fb7f5e338021c916df31f4" width="409" height="166" data-path="images/guide/getting-started/first-agent-25.png" />
</Frame>

* **Task list** - right panel shows upcoming and completed tasks
* **Agent Dashboard** - access via the three-dots menu next to Activate
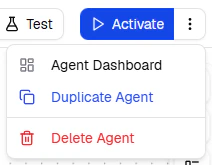
<Frame caption="Task detail view">
  <img src="https://mintcdn.com/bondata/gJUBvJUhIKDjFqN7/images/guide/getting-started/first-agent-26.png?fit=max&auto=format&n=gJUBvJUhIKDjFqN7&q=85&s=d44608a435fde0e99555ecb1286afd73" width="212" height="165" data-path="images/guide/getting-started/first-agent-26.png" />
</Frame>

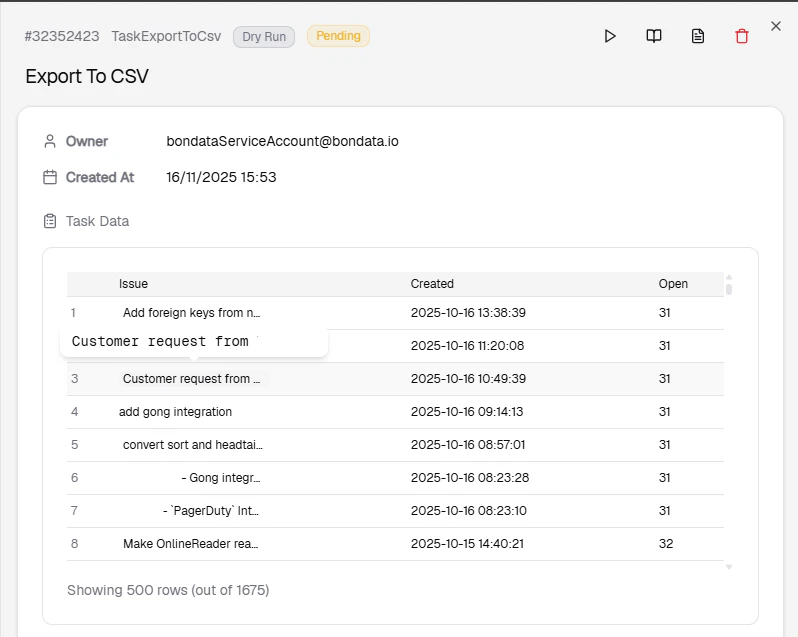
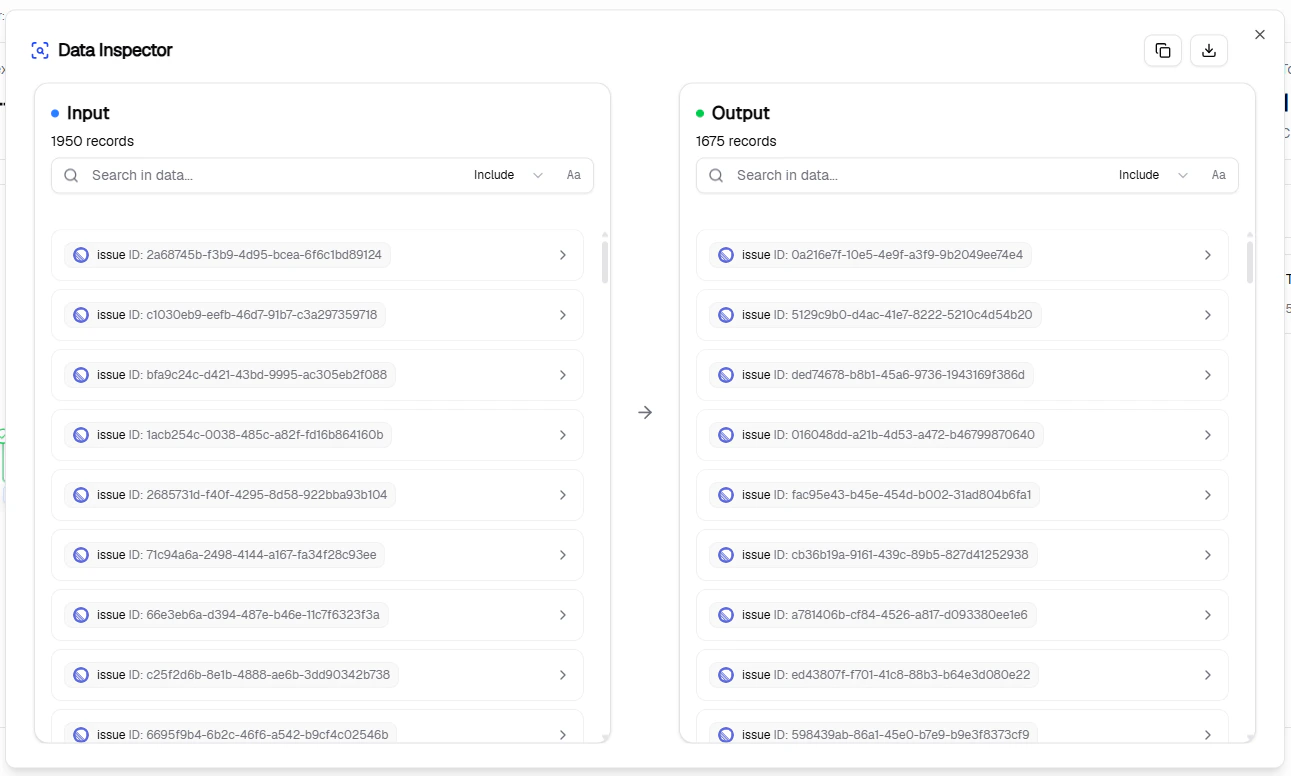
Track task statuses (Running, Pending, Failed, Success), view results for individual nodes, and drill into specific task outputs.
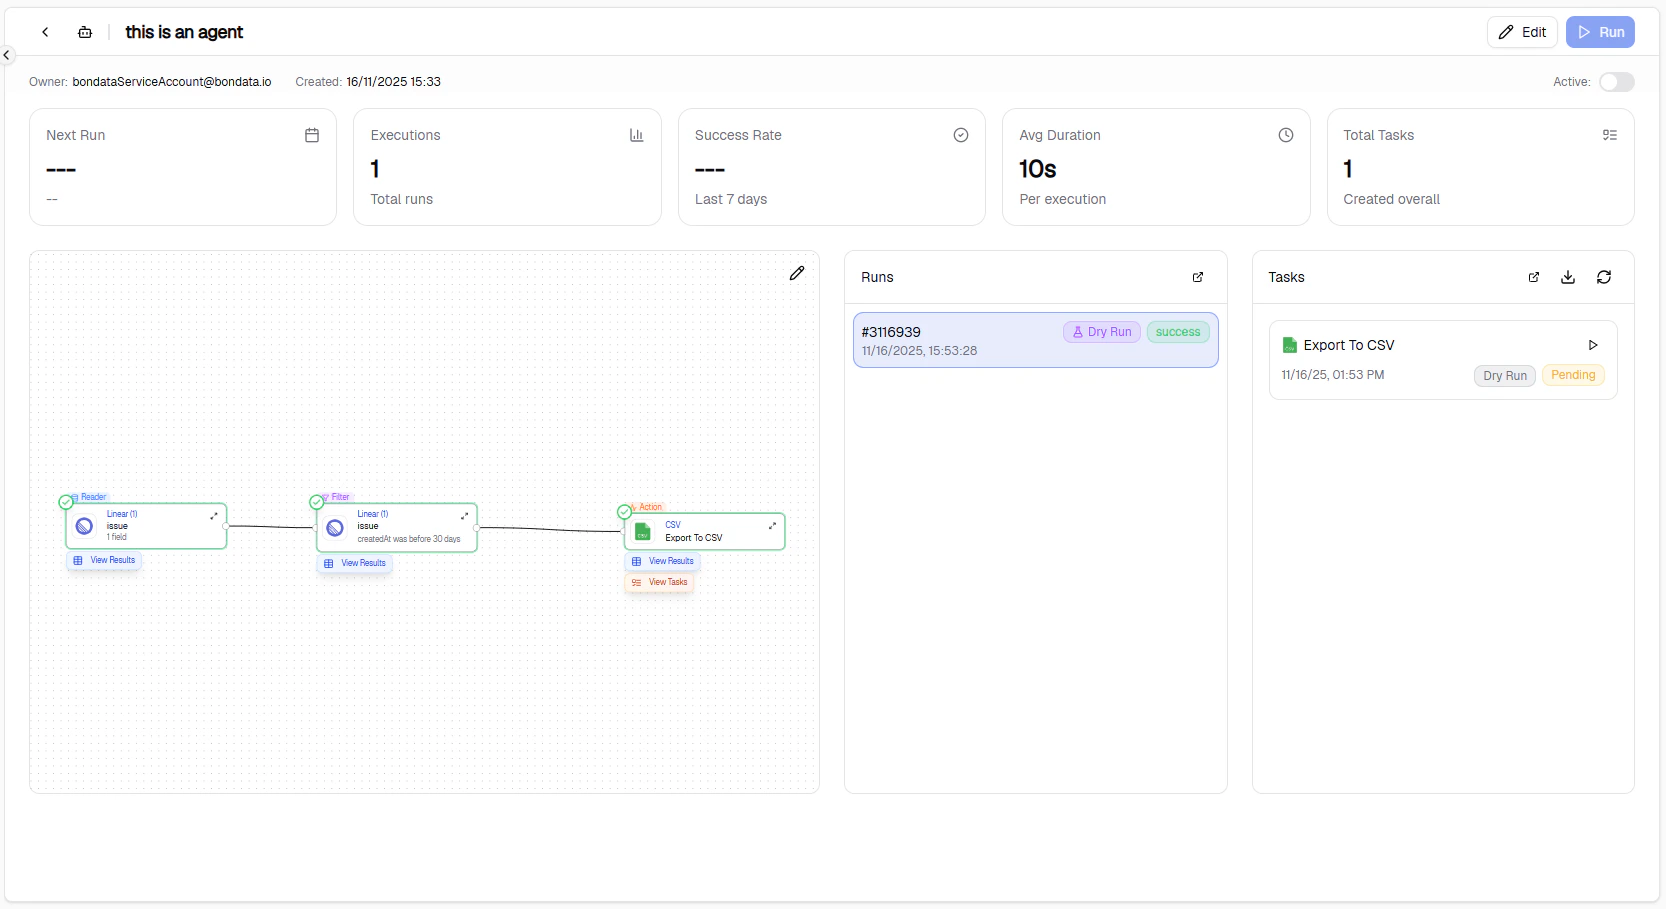
<Frame caption="Detailed task execution results">
  <img src="https://mintcdn.com/bondata/gJUBvJUhIKDjFqN7/images/guide/getting-started/first-agent-27.png?fit=max&auto=format&n=gJUBvJUhIKDjFqN7&q=85&s=2ef46cf5b1eb8eb32598c73cdae80783" width="1666" height="909" data-path="images/guide/getting-started/first-agent-27.png" />
</Frame>

<Frame caption="Node-level results view">
  <img src="https://mintcdn.com/bondata/gJUBvJUhIKDjFqN7/images/guide/getting-started/first-agent-28.png?fit=max&auto=format&n=gJUBvJUhIKDjFqN7&q=85&s=f2ee9bbe2dcf1d4a1447cd976813b7f4" width="1291" height="776" data-path="images/guide/getting-started/first-agent-28.png" />
</Frame>

<Frame caption="Complete Agent execution overview">
  <img src="https://mintcdn.com/bondata/gJUBvJUhIKDjFqN7/images/guide/getting-started/first-agent-29.png?fit=max&auto=format&n=gJUBvJUhIKDjFqN7&q=85&s=76ee8a7447c2b307d293e526c6b81e1b" width="798" height="637" data-path="images/guide/getting-started/first-agent-29.png" />
</Frame>

## Learn more

<Columns cols={2}>
  <Card title="Building Agents" icon="hammer" href="/guide/agents/building-agents">
    Deep dive into filters, Mentions, and trigger settings.
  </Card>

  <Card title="Sample Use Cases" icon="lightbulb" href="/guide/agents/sample-use-cases">
    Real-world Agent templates for common workflows.
  </Card>
</Columns>