> ## Documentation Index
> Fetch the complete documentation index at: https://docs.bondata.ai/llms.txt
> Use this file to discover all available pages before exploring further.
# Bondata Cloud
> Query and explore your integration data in BonData's built-in data warehouse
Every integration you connect to BonData automatically syncs its data into a structured data warehouse. **Bondata Cloud** is the built-in warehouse that comes with your account - no setup required.
You can browse all synced entities, see how data is organized into RAW and SILVER layers, and run SQL queries directly from the platform.
## How data flows into the warehouse
When you connect an integration and activate entities, BonData creates two layers of tables for each entity:
| Layer | Purpose | Naming pattern |
| ---------- | -------------------------------------------------------------- | ---------------------------------------------------- |
| **RAW** | Unprocessed data exactly as it comes from the source | `raw_{app}_{integration_id}_{entity}` |
| **SILVER** | Cleaned, validated, and schema-aligned version of the RAW data | `silver_{app}_{integration_id}_{entity_id}_{entity}` |
RAW tables are created automatically when data is first fetched. SILVER tables are generated shortly after by a background refinement process that validates types, resolves enums, and computes primary keys.
All tables are stored in a tenant-specific schema (e.g., `BONDATA_YourCompany`), keeping your data isolated from other accounts.
## Entities tab
Go to **Data > Data Warehouse** in the sidebar, then select your warehouse. The **Entities** tab shows every integration and its entities, along with the corresponding RAW and SILVER table names.
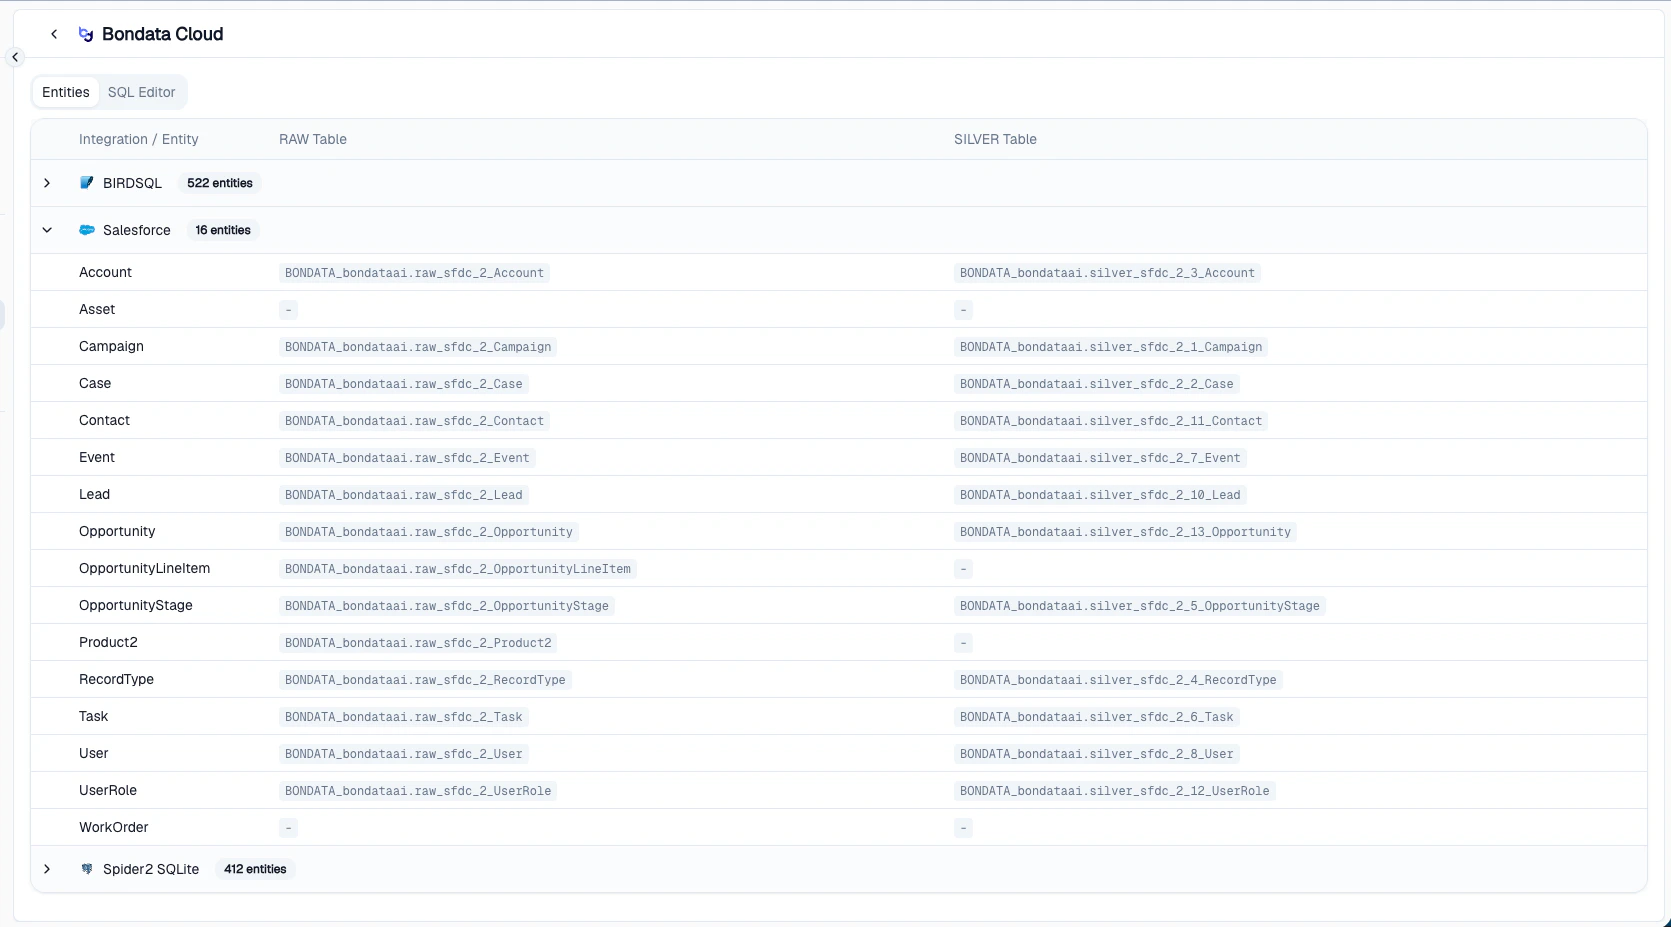 Use this view to:
* See which entities have been synced and are queryable
* Verify that both RAW and SILVER tables exist for an entity
* Check object counts per table
* Quickly find the exact table name you need for a SQL query
## SQL Editor
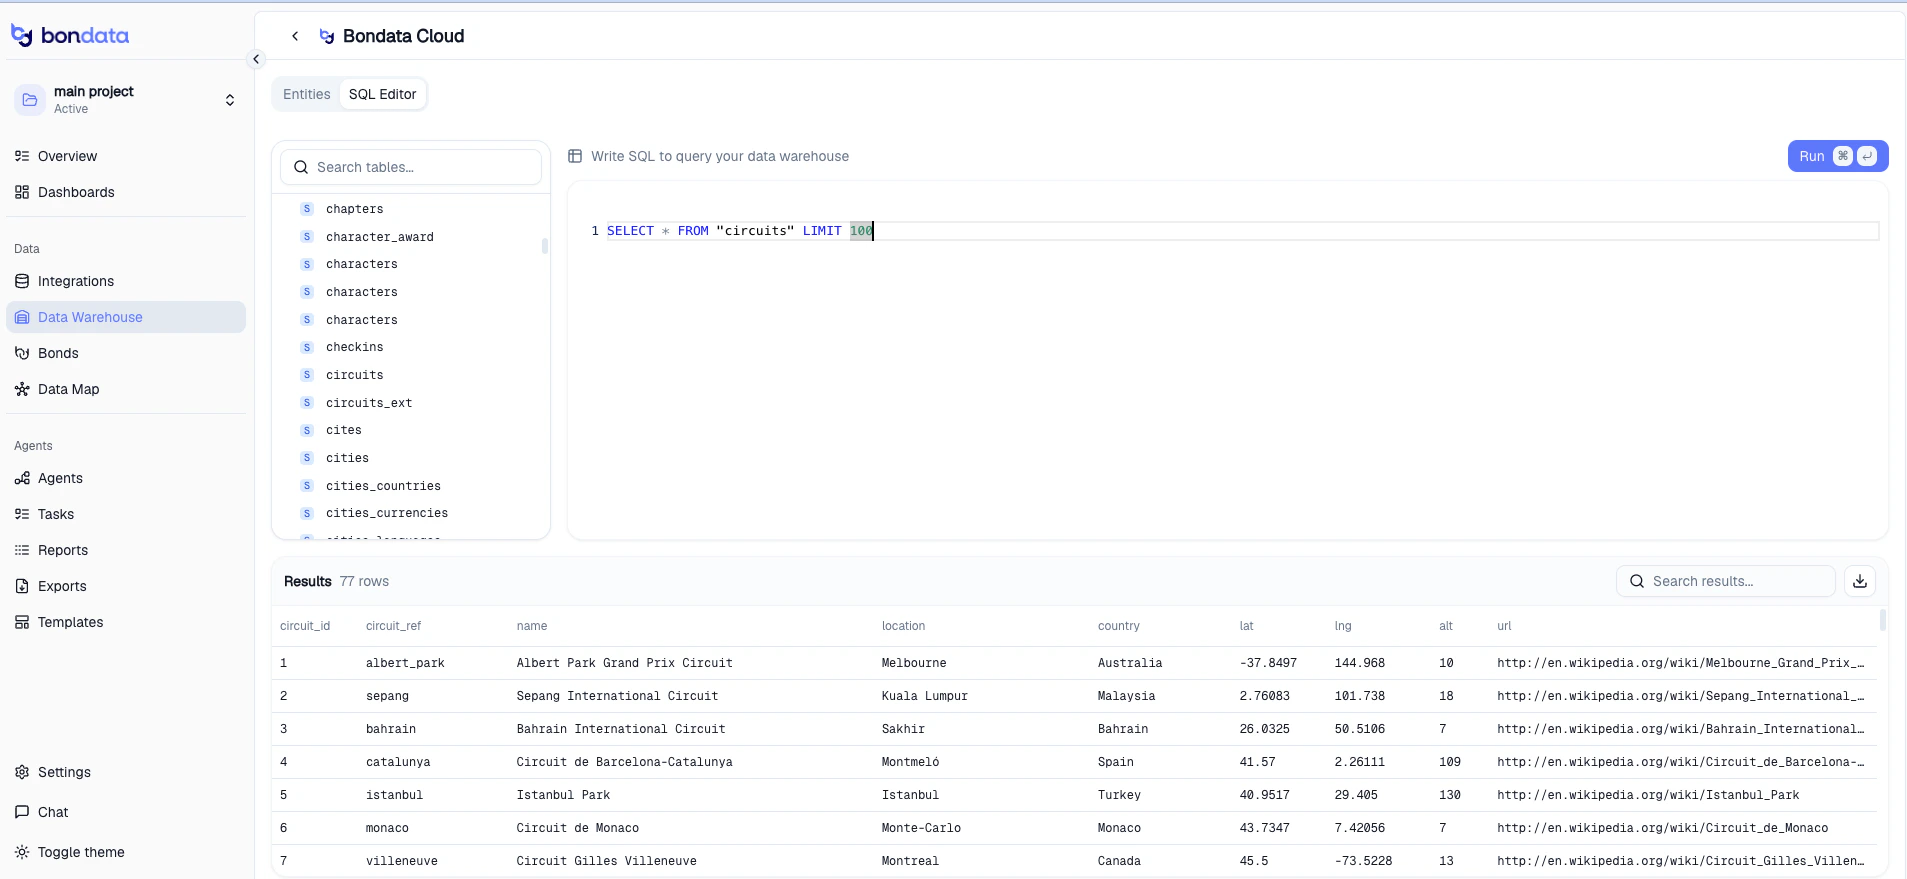
Switch to the **SQL Editor** tab to query your warehouse data directly. The editor includes a table browser, syntax highlighting, autocomplete, and a results panel.
Use this view to:
* See which entities have been synced and are queryable
* Verify that both RAW and SILVER tables exist for an entity
* Check object counts per table
* Quickly find the exact table name you need for a SQL query
## SQL Editor
Switch to the **SQL Editor** tab to query your warehouse data directly. The editor includes a table browser, syntax highlighting, autocomplete, and a results panel.
 ### Writing queries
* Write standard SQL `SELECT` statements in the editor
* Press **Cmd/Ctrl + Enter** to execute
* Click any table name in the left sidebar to auto-generate a `SELECT * FROM "table" LIMIT 100` query
* Results display up to 1,000 rows - a warning appears if results are truncated
### Table browser
The left panel lists all available tables grouped by type (RAW and SILVER). Use the search bar to filter by name. Click a table to preview its data instantly.
### Export results
Download query results as a CSV file using the export button in the results panel.
The SQL Editor is read-only - you can query data but not modify it. This keeps your source data safe while giving you full flexibility to explore.
## Choosing a warehouse for an integration
By default, integration data is stored in Bondata Cloud. If your organization has connected external warehouses (PostgreSQL or Snowflake), you can choose where each integration's data is stored.
During integration setup, expand the **Advanced** section at the bottom of the configuration dialog. Under **Data Warehouse**, select the target warehouse from the dropdown.
### Writing queries
* Write standard SQL `SELECT` statements in the editor
* Press **Cmd/Ctrl + Enter** to execute
* Click any table name in the left sidebar to auto-generate a `SELECT * FROM "table" LIMIT 100` query
* Results display up to 1,000 rows - a warning appears if results are truncated
### Table browser
The left panel lists all available tables grouped by type (RAW and SILVER). Use the search bar to filter by name. Click a table to preview its data instantly.
### Export results
Download query results as a CSV file using the export button in the results panel.
The SQL Editor is read-only - you can query data but not modify it. This keeps your source data safe while giving you full flexibility to explore.
## Choosing a warehouse for an integration
By default, integration data is stored in Bondata Cloud. If your organization has connected external warehouses (PostgreSQL or Snowflake), you can choose where each integration's data is stored.
During integration setup, expand the **Advanced** section at the bottom of the configuration dialog. Under **Data Warehouse**, select the target warehouse from the dropdown.
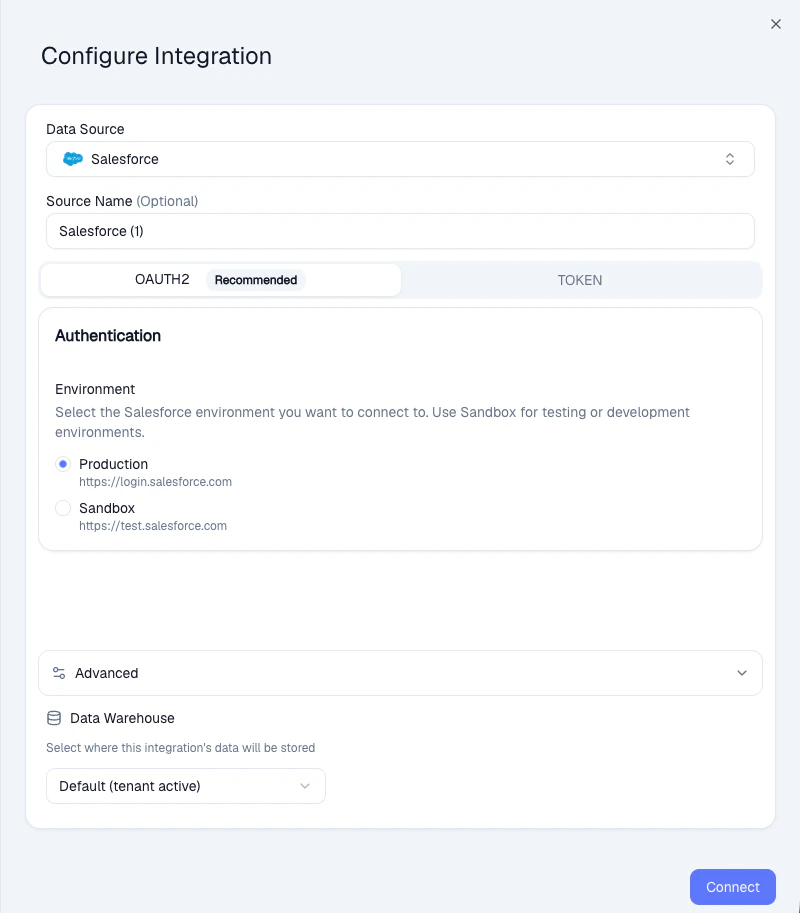 The warehouse selection applies to all entities within that integration. Choose the warehouse before activating entities - changing it later requires re-syncing.
## Supported warehouses
In addition to the built-in Bondata Cloud, you can connect your own data warehouse as a storage target.
### Available now
| Warehouse | Auth methods |
| -------------- | -------------------------------------------- |
| **PostgreSQL** | Basic (host, port, database, user, password) |
| **Snowflake** | Basic, Key Pair, OAuth2, Token |
### Coming soon
| Warehouse | Status |
| --------------------------- | -------------- |
| **BigQuery** | In development |
| **Databricks** | In development |
| **Azure Synapse Analytics** | In development |
To add a warehouse connection, go to **Data > Data Warehouse** and click **Add Warehouse**. Once active, it will appear as an option when configuring integrations.
## What's next
Add a data source and start syncing entities.
Control which datasets are active in your warehouse.
The warehouse selection applies to all entities within that integration. Choose the warehouse before activating entities - changing it later requires re-syncing.
## Supported warehouses
In addition to the built-in Bondata Cloud, you can connect your own data warehouse as a storage target.
### Available now
| Warehouse | Auth methods |
| -------------- | -------------------------------------------- |
| **PostgreSQL** | Basic (host, port, database, user, password) |
| **Snowflake** | Basic, Key Pair, OAuth2, Token |
### Coming soon
| Warehouse | Status |
| --------------------------- | -------------- |
| **BigQuery** | In development |
| **Databricks** | In development |
| **Azure Synapse Analytics** | In development |
To add a warehouse connection, go to **Data > Data Warehouse** and click **Add Warehouse**. Once active, it will appear as an option when configuring integrations.
## What's next
Add a data source and start syncing entities.
Control which datasets are active in your warehouse.